ENG 004 Lecture 17, Nov 27, 2012
Announcements
- Homework #7 due on Thursday
- Read Chapter 8
Topics
Section Views

Section Views
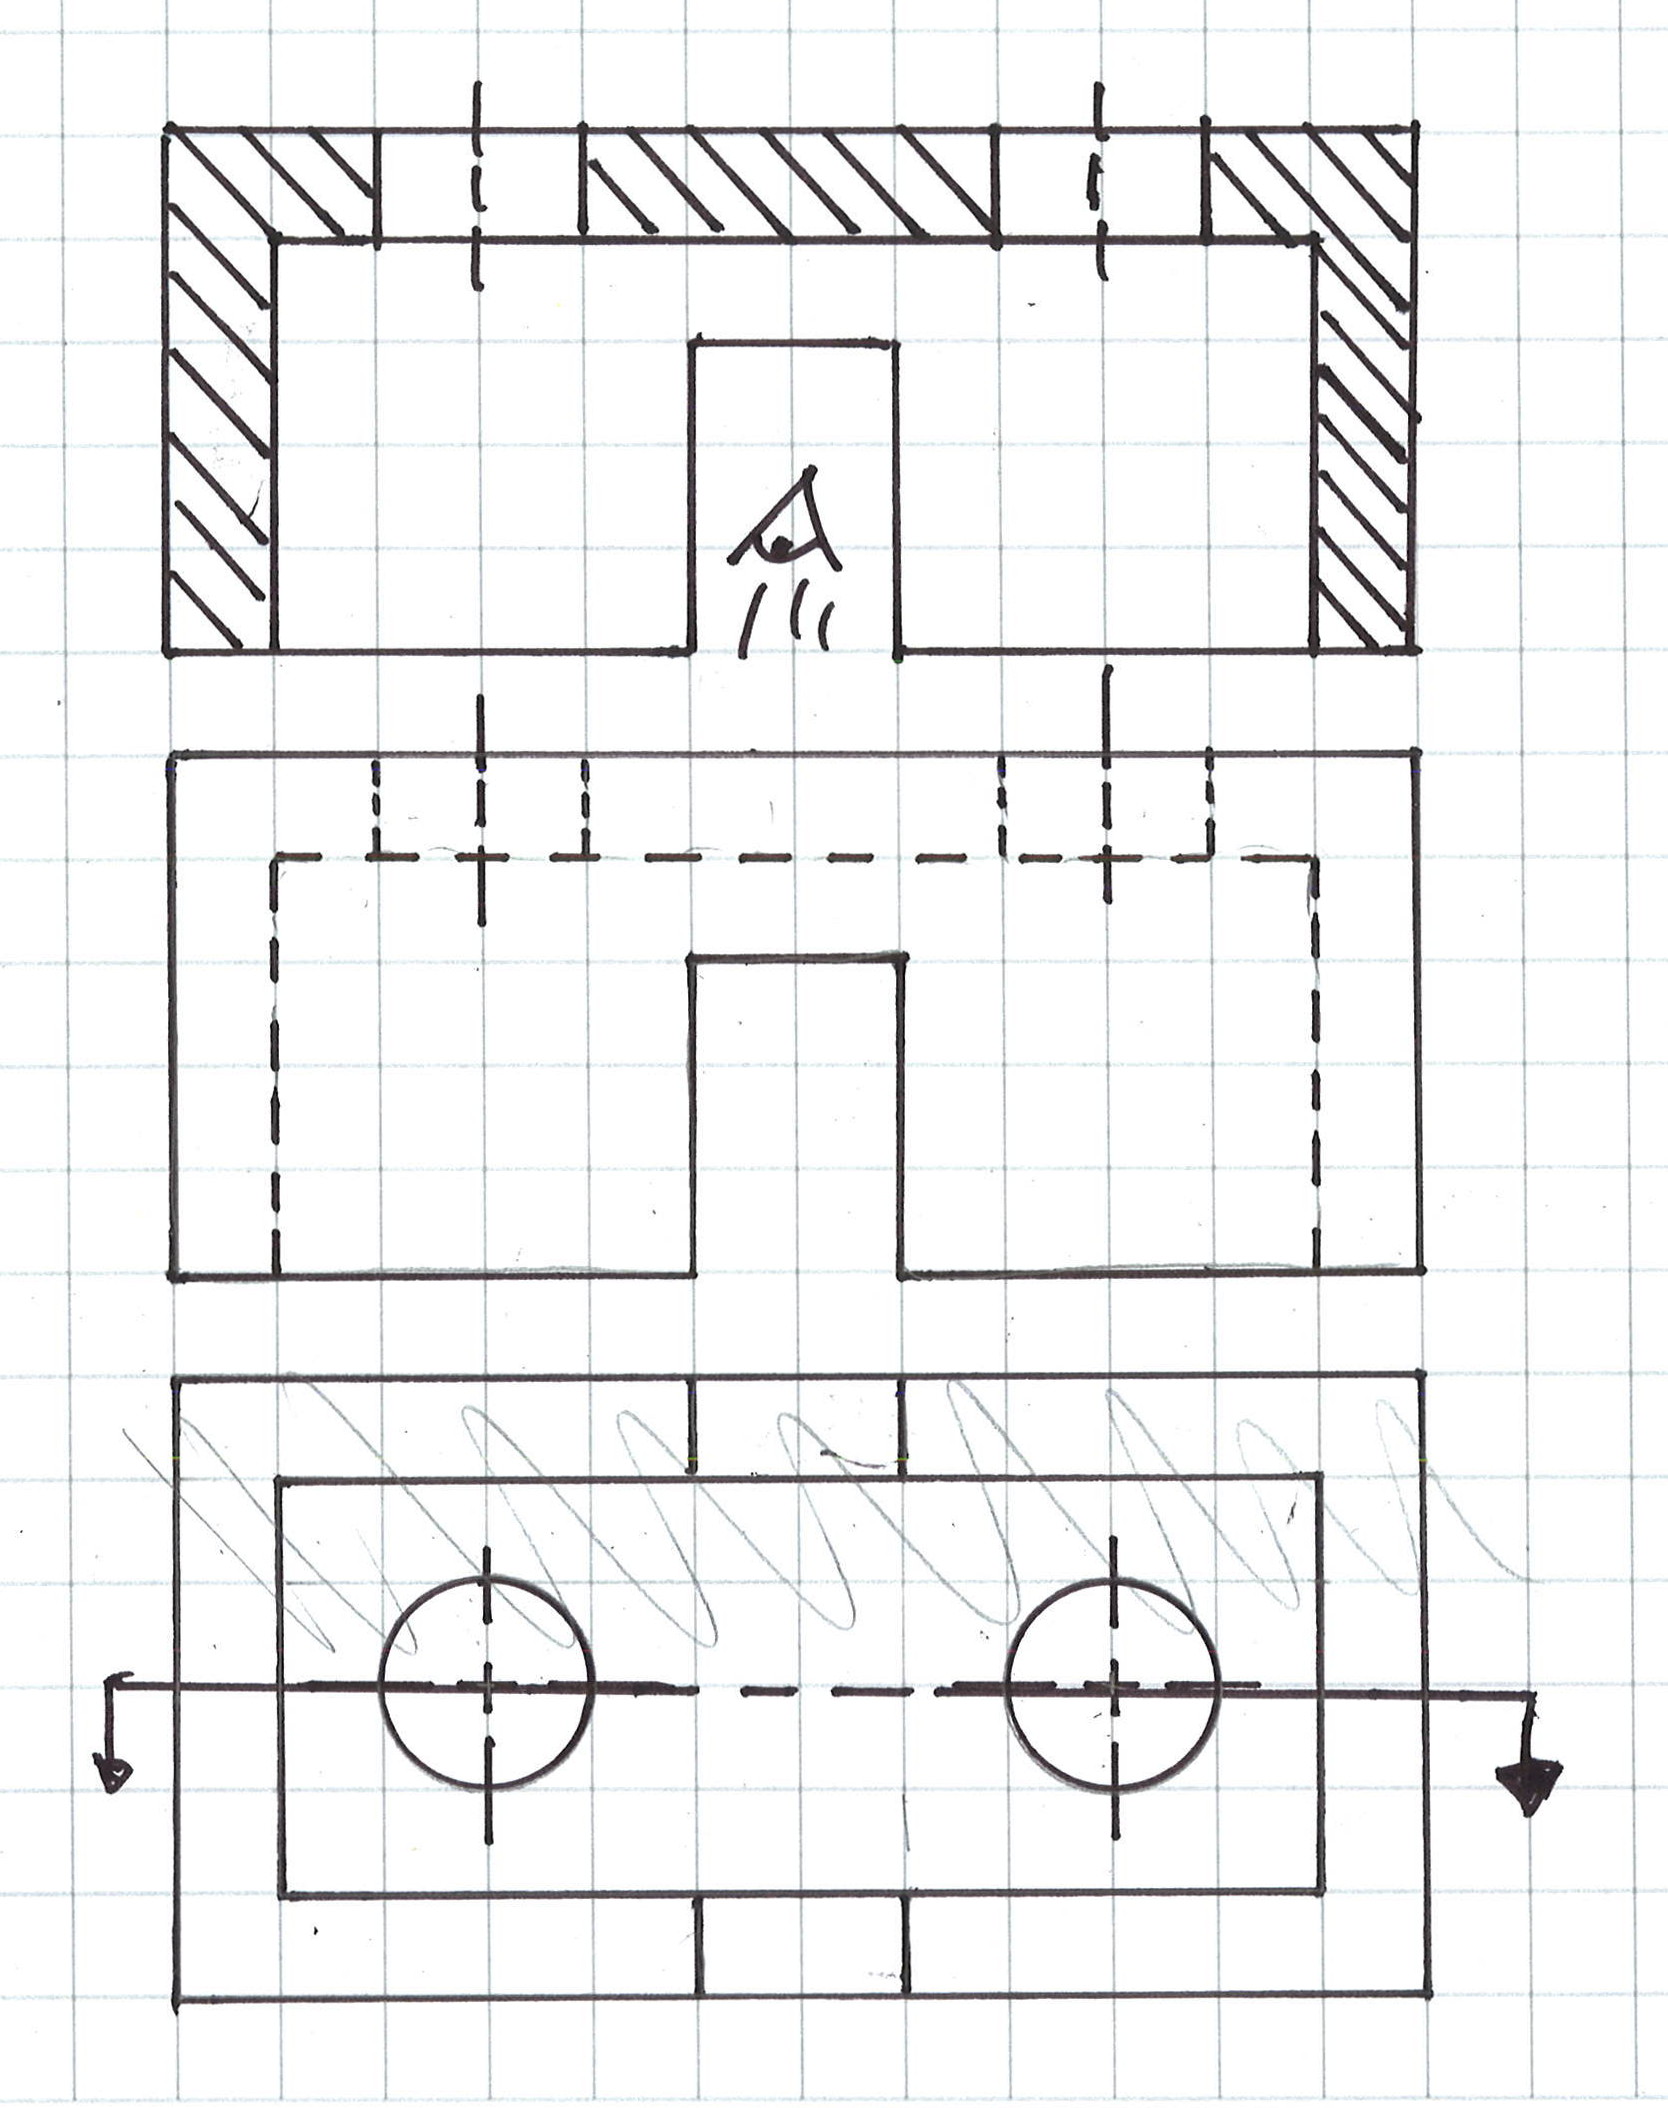
- Sections are used to clarify interior construction that cannot be
clearly described by hidden lines in exterior views.
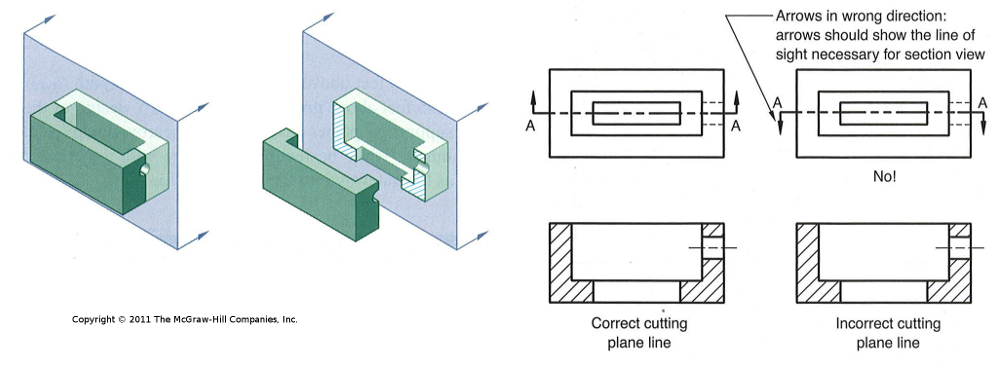
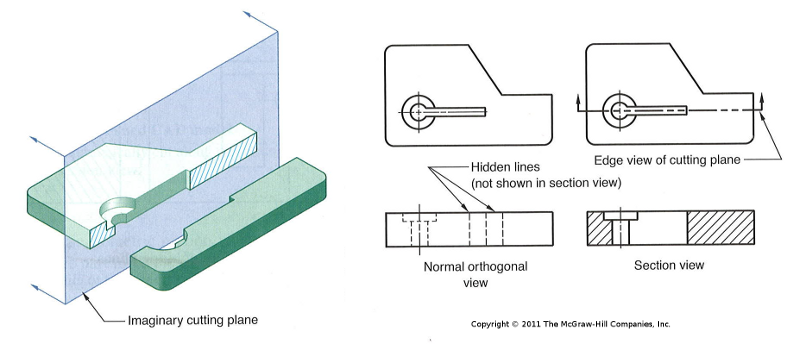
- Section views are obtained by an imaginary cutting plane passed through
the object perpendicular to the line of sight.
- The portion of the object between the cutting plane and the observer is
assumed to be removed and section lines indicate the exposed surfaces.
- Hidden lines behind the cutting plane are omitted in section
views.
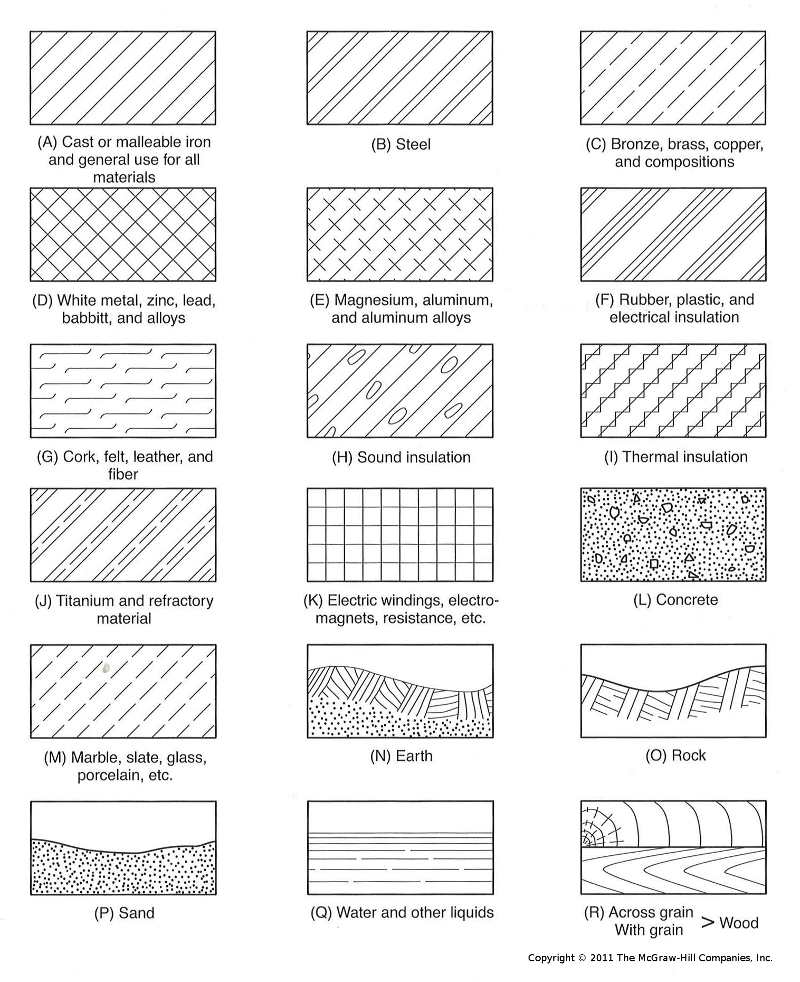
- The cut surfaces are indicated using cross
hatching
Section Views

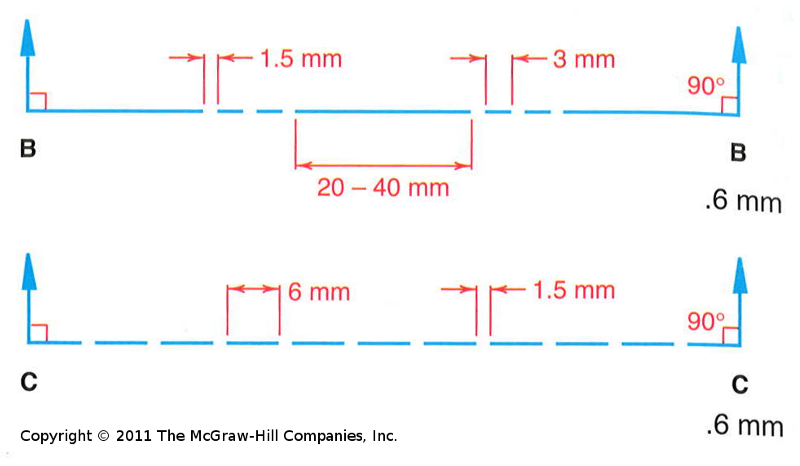
Cutting Plane Lines

Cutting Plane Lines

Hatch Styles

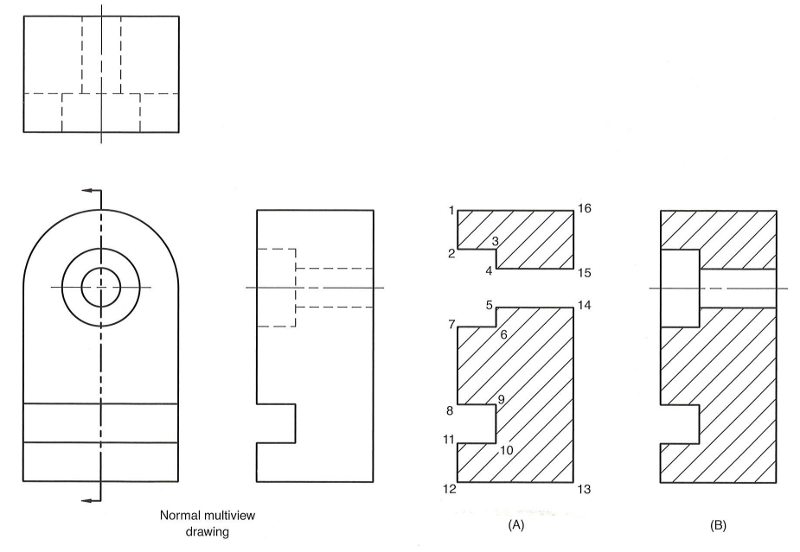
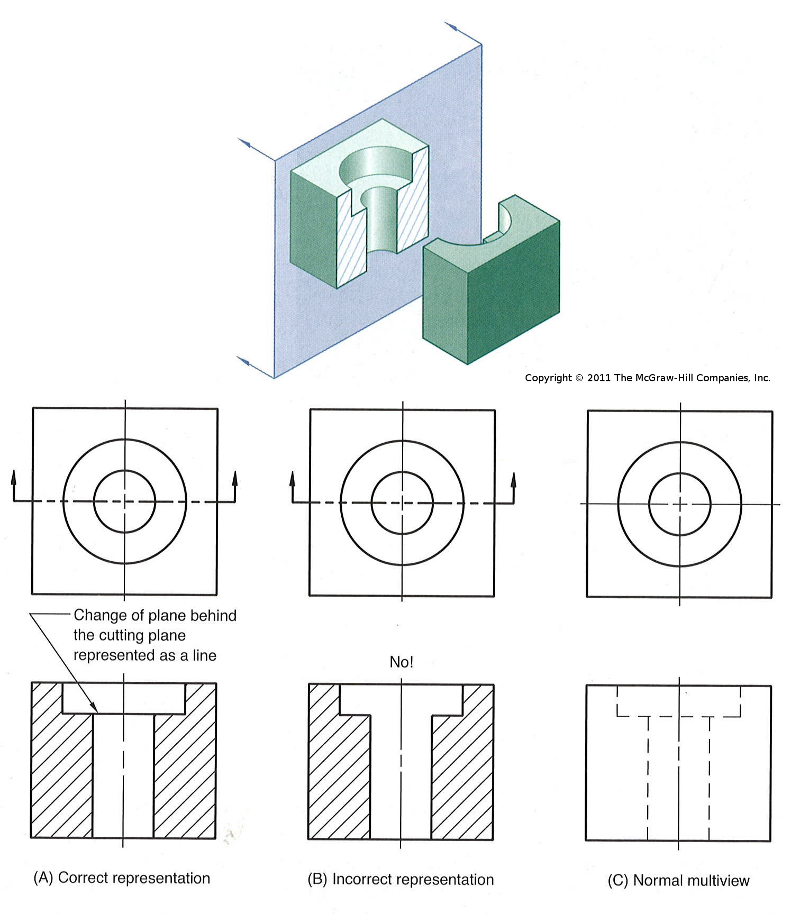
Full Section View

Full Section View Process

Hidden Lines

Edges

Multiple Sections

Half Section
Used to show features of 1/2 the part (usually these parts have circular
symmetry)

Offset Section
Used to include features not found on a single plane but on parallel
planes.

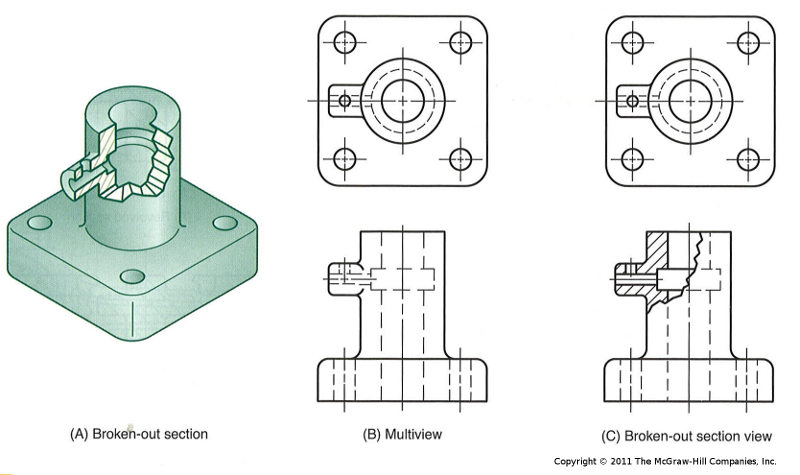
Broken Views
Shows only a small portion of the part's interior

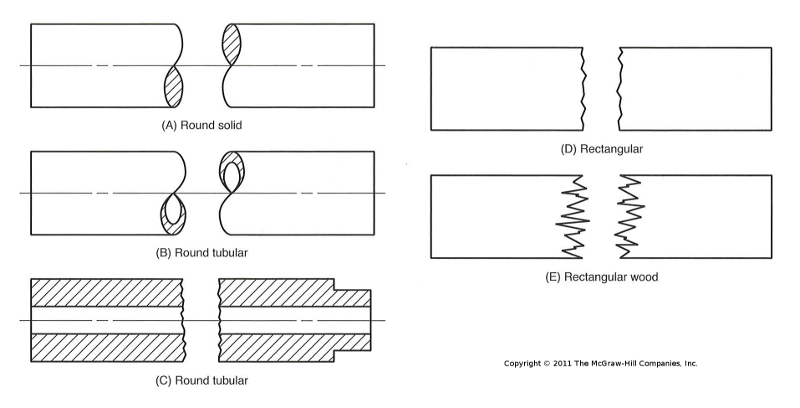
Conventional Breaks

Conventional Break Symbols

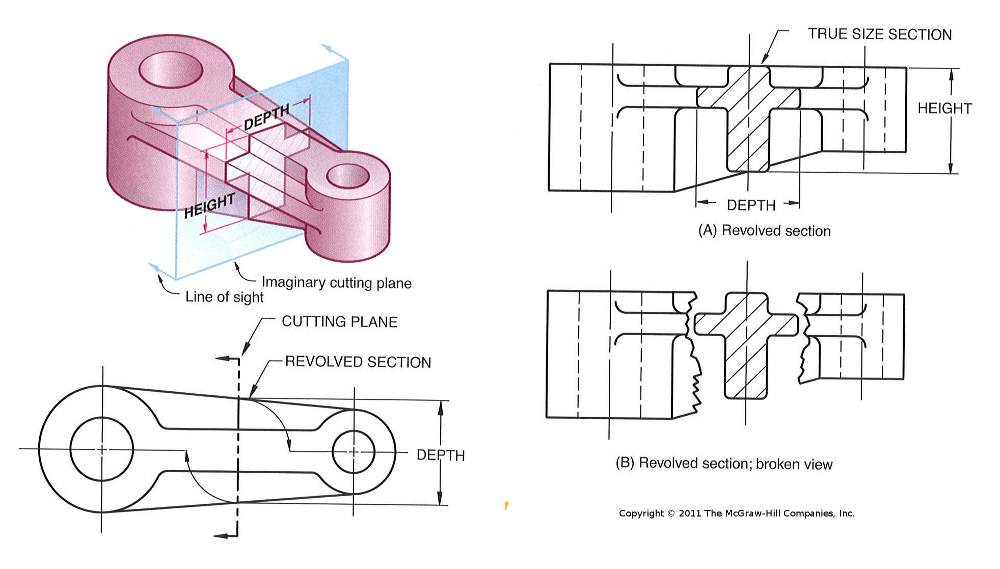
Revolved View
Show the internal features of a part in one of the standard views.

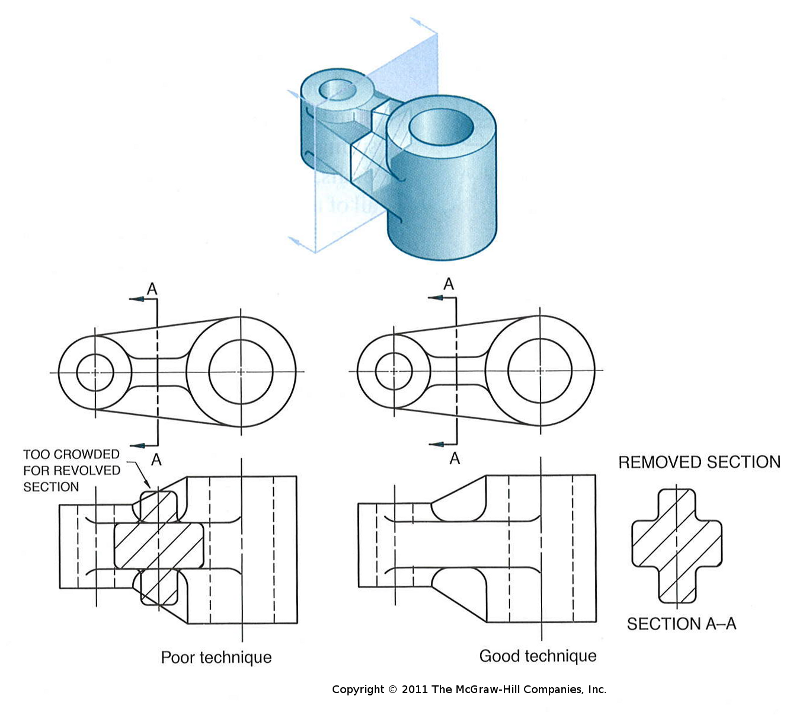
Removed View
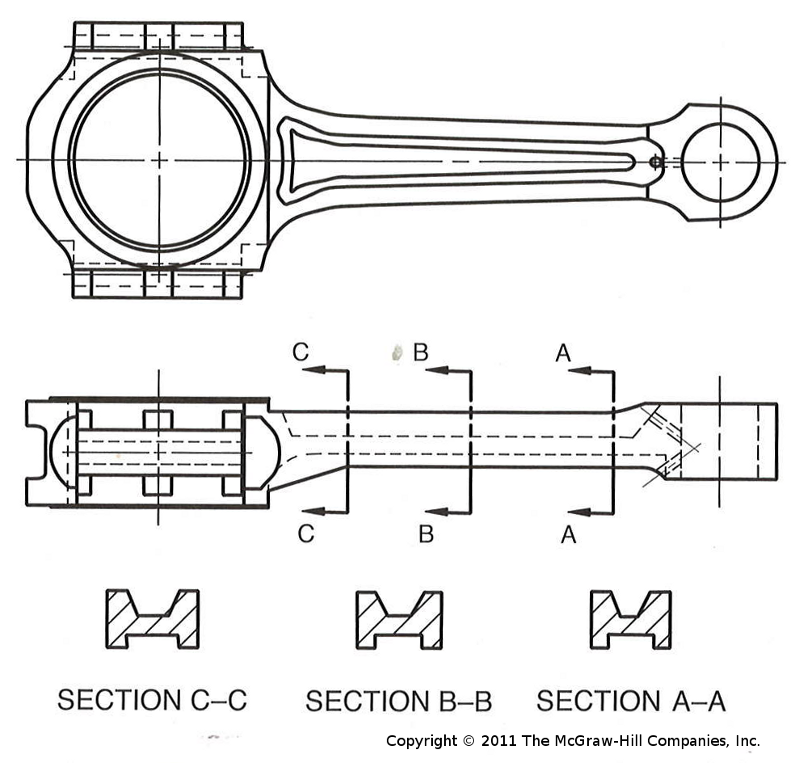
Shows internal features along the length of a part

Multiple Removed Views

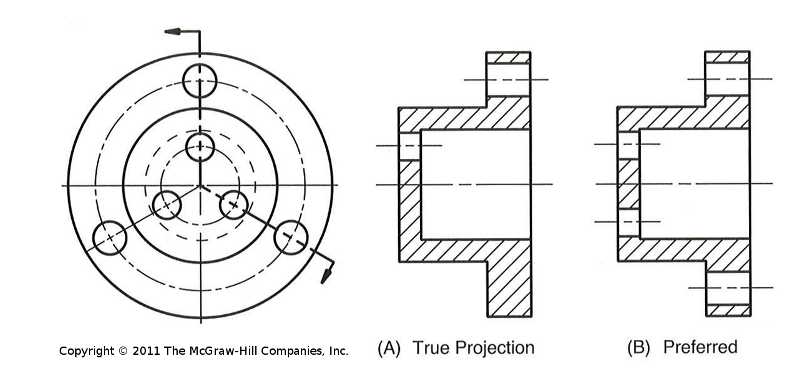
Aligned Views
Used to show features not on a single cutting plane, nor parallel cutting
planes, but on cutting planes that intersect through a single axis

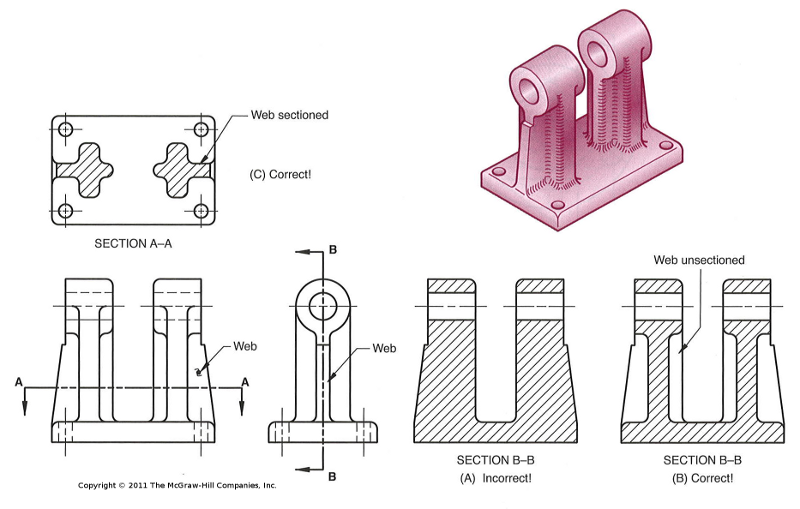
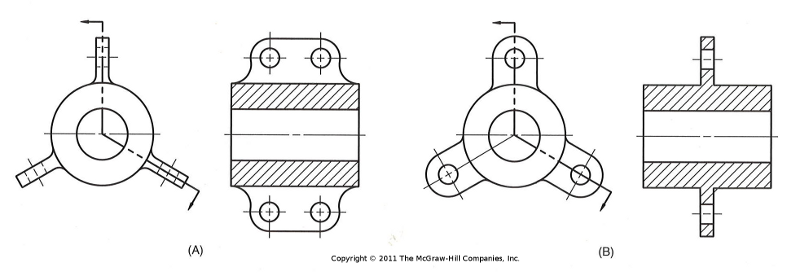
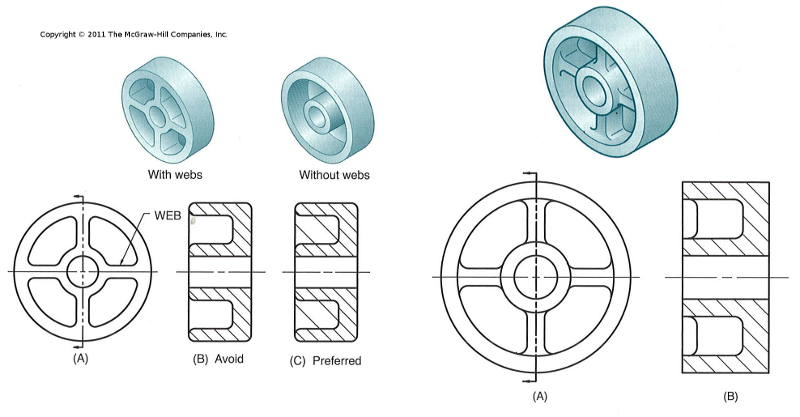
Ribs, Webs, Lugs, Flanges

Webs

Aligned Lugs

Aligned Ribs

Aligned Spokes

Alternate Web Section

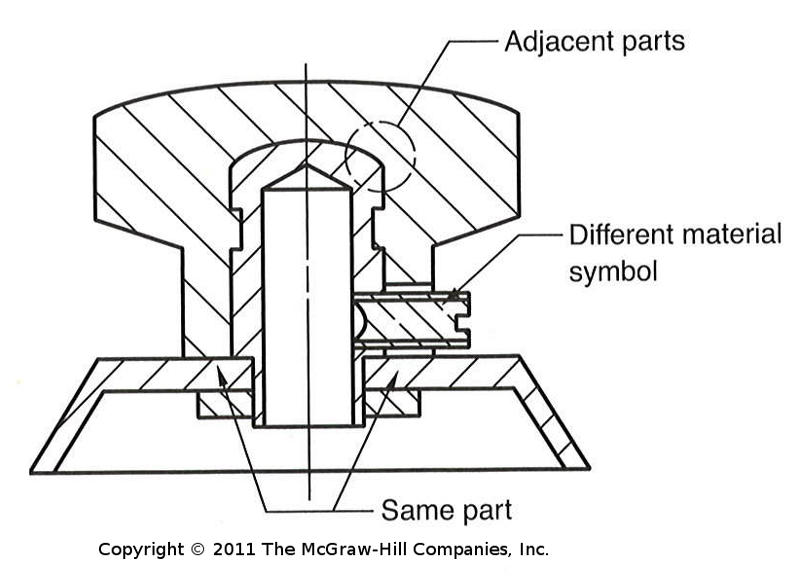
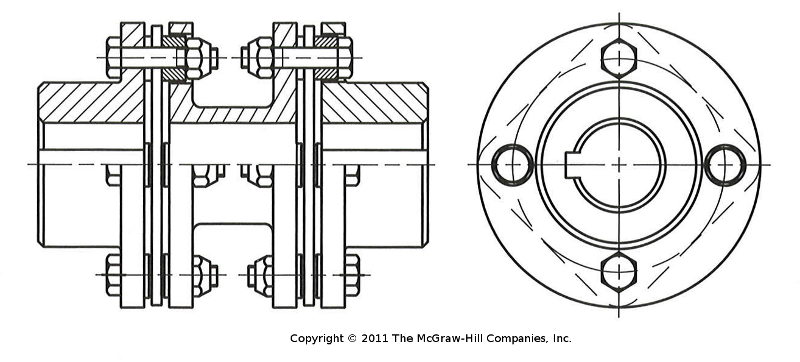
Sectioned Assemblies

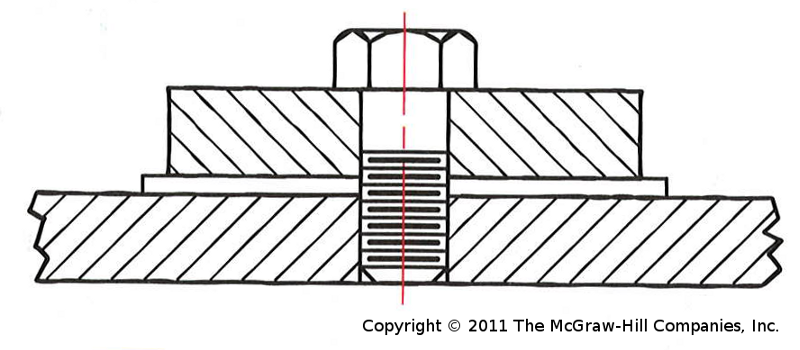
Standard Parts

Thin Parts

Section Example
 ←
→
←
→
/
#


