- vr 10 februari 2017
- education
- Jason K. Moore
- #design, #mechanical engineering, #prototyping
Introduction
In our mechanical engineering curriculum, we teach a required upper level mechanical engineering course entitled "Mechanical Design". This course is primarily focused on teaching students how to apply theories of stress and strain prediction to determine if arbitrary mechanical parts and structures are likely to fail under static and dynamic loads. Students are also expected to gain experience in conceptual design of a mechanical device and applying the learned failure theories to prove its structural soundness. Traditionally, the course has focused mostly on failure prediction and has provided students with relatively less practical instruction on how to develop the mechanical design concept. Our goal, however, has been to give a primer on the conceptual design process in the context of applying the failure theories that better prepares them for the design methodologies taught in their followup capstone design course.
It is worth noting that the only other design experience our students are guaranteed to have before arriving to this class is the design of a simple interlocking part in our prerequisite manufacturing class. That project is designed such that the students learn how tolerances and communication are essential to having parts that can be successfully integrated with another designer's. The effort described in this article is part of a plan to provide more design experiences throughout our curriculum.
For the past two years, we have had the students design a bicycle rack which attaches to the front of a transit bus. The rack has to meet certain stated specifications and should withstand specified static and dynamic loads. We have introduced the following interactive design activities to help students shape their conceptual design:
- Research and reverse engineering of existing bicycle rack technologies.
- Need and specification development with an informative visit to the local bus maintenance facility.
- Concept generation.
- Lightweight prototyping.
- Concept selection.
- Static failure modeling and analysis.
- Dynamic failure modeling and analysis.
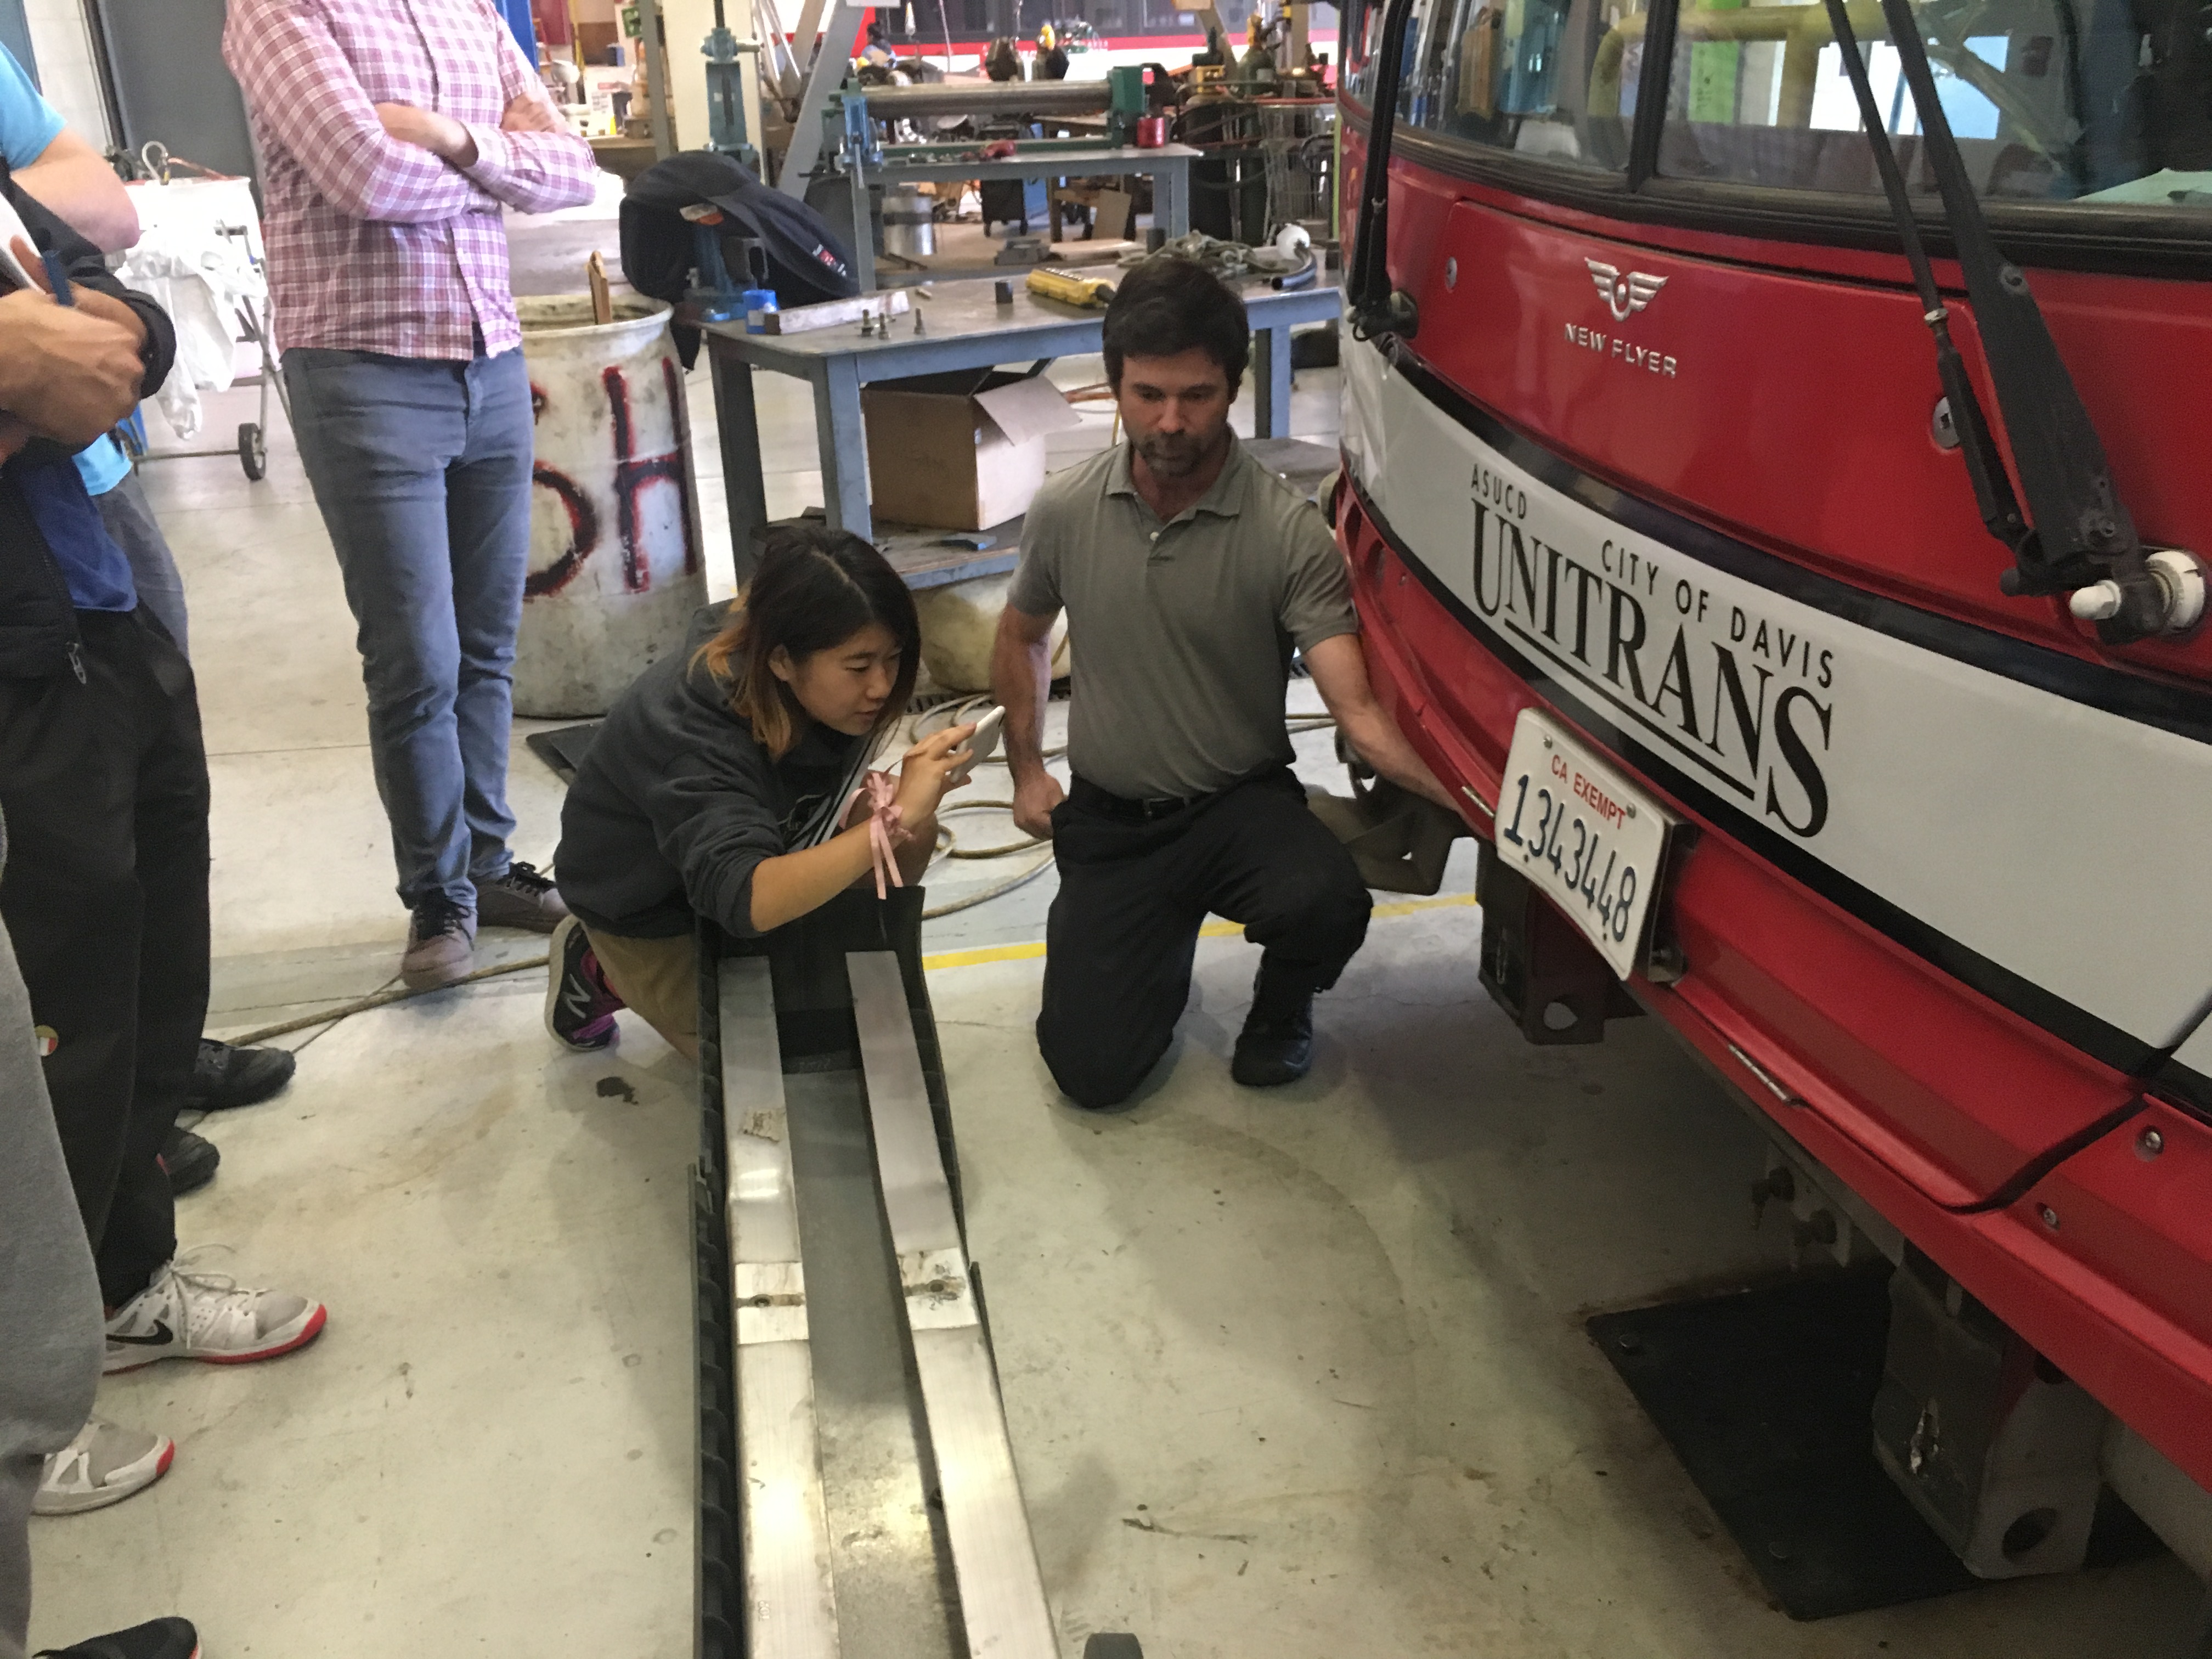
Andrew Wyly, the Unitrans Maintenance Manager, describing the details of the front end of the bus.
This year was the first year that we introduced the 4th step in the above list, lightweight prototyping, with the goal of broadening the tools and methods students can use during the design process. The learning objectives for the in-class activity were multifold:
- The students will be able to use rapid, cheap, and simple prototyping to evaluate their designs for form, function, and structural integrity.
- Students will work in teams.
- Students will perform a hands-on engineering activity.
Inspiration
Initial ideas for this lesson were inspired by Olin College's "Design Nature" course where freshman students design and construct insect-influenced hopping machines out of simple materials. Our college's new pilot first-year engineering course was also an influence. This new course is structured around a hands-on design challenge in which the students create a small manually operated machine. Both of these courses implement project based learning with heavy emphasis on hands-on activities. Education research points to improved retention, student satisfaction, diversity, and student learning when these methods are employed [1] and that prototyping results in more successful designs [2].
Goals
Our hypothesis is that students are able to generate more effective designs when they pair prototyping and testing with theoretical justification. Design firms, especially in the industrial design and architectural realms, make heavy use of physical prototypes to learn about a design's functionality and form. These firms see lightweight prototyping as an essential component in creating excellent designs. Additionally, there are few successful mechanical designs that exist where prototyping and testing has not played a critical role in evaluating structural integrity.
Our goal is to evaluate the efficacy of creating what we call "lightweight prototypes" early in the design process (concept generation and concept selection phases). With inexpensive, yet realistically similar materials and rapid construction methods scaled three dimensional functional prototypes can quickly be created for difference concepts. These prototypes allow the designer to see and feel things that cannot be easily sensed from CAD and mathematical models, especially for students that have little past experience making mechanical structures. These prototypes ideally help bridge the gap from theory to reality.
Development
To develop the prototyping activity, several sample prototypes were created using different inexpensive materials, e.g. wood dowels, steel wires, aluminum cans, foam poster boards, etc. In the end, the materials and tools provided for the students were chosen after considering time constraints, safety, material costs, simplicity, design flexibility, and the ability of the prototype to predict failure modes. For example, although using metal would have provided a more accurate representation of the bike racks' behavior, prototyping with metal would require soldering, shearing, rolling, and bending tools and would have been impractical for the allotted time and class space. For the activity we settled on 1/8" wooden dowels, 1/8" thick balsa sheets, posterboard, large steel paper clips, and large tongue depressors. We provided hot glue guns to secure the materials together along with scissors, exacto knives, and a small hack saw for cutting.
Implementation
The week prior to the prototyping activity the students went through a concept generation sketching process and were asked to select two of the complete bicycle rack designs that they generated to construct prototypes of. Before the prototyping lesson class period, they were asked to read the prototyping chapter from the course text [3] and complete a short online quiz to assess their understanding of the reading materials. We also prepared a handout with instructions for the activity and photos of successful hot glue joints that we'd previously experimented with which they received prior to the lesson.
The 110 minute class session began with a short description of prototyping to help recall some of the reading material and a brief introduction to the prototyping activity. The students were then provided with the materials described above to realize a 1:10 scaled version of their two design sketches. Pairs of students worked on each design. We also provided them a 1:10 scale bicycle laser cut from thin steel to use as a reference prop.
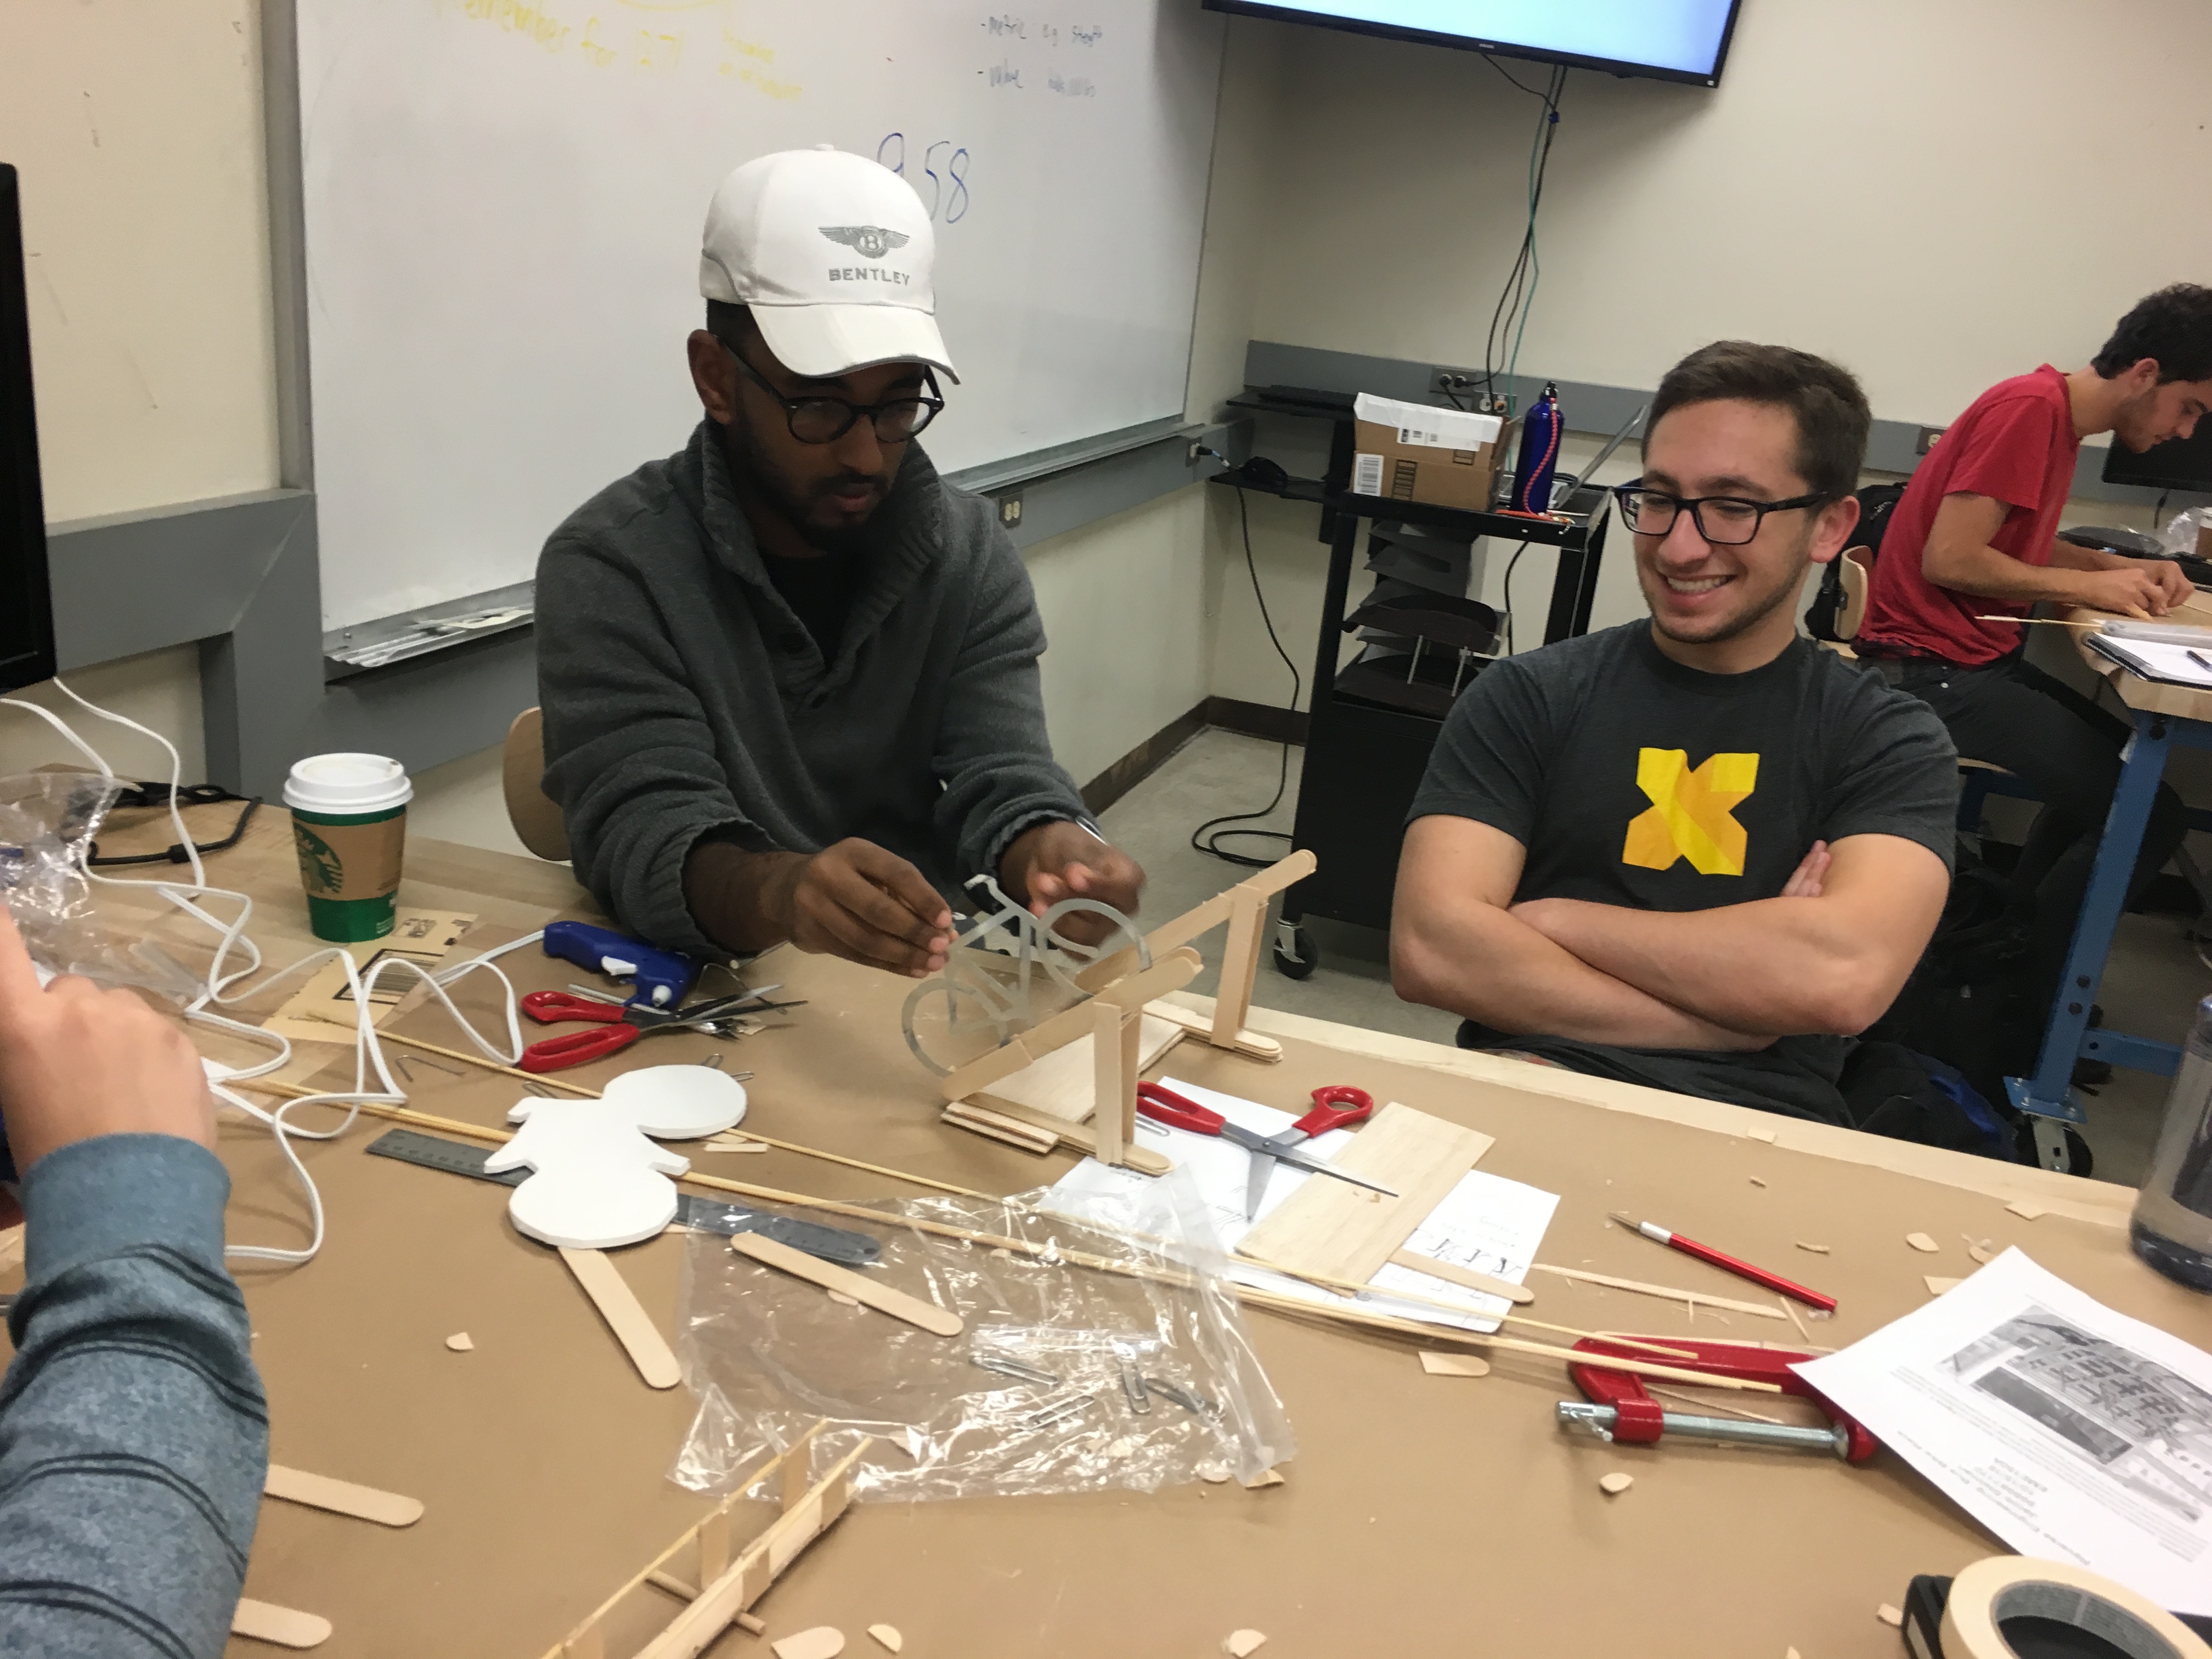
Students in during the prototyping lesson in the MAE Design Studio.
At the end of the construction period, the scaled racks were attached to a table with a C-clamp and tested for their ability to secure the bicycle both static and dynamically, i.e. we shook the table. Secondly, we tested whether or not the rack could withstand the maximum specified load applied to the worst case location and checked for failure and deflection.
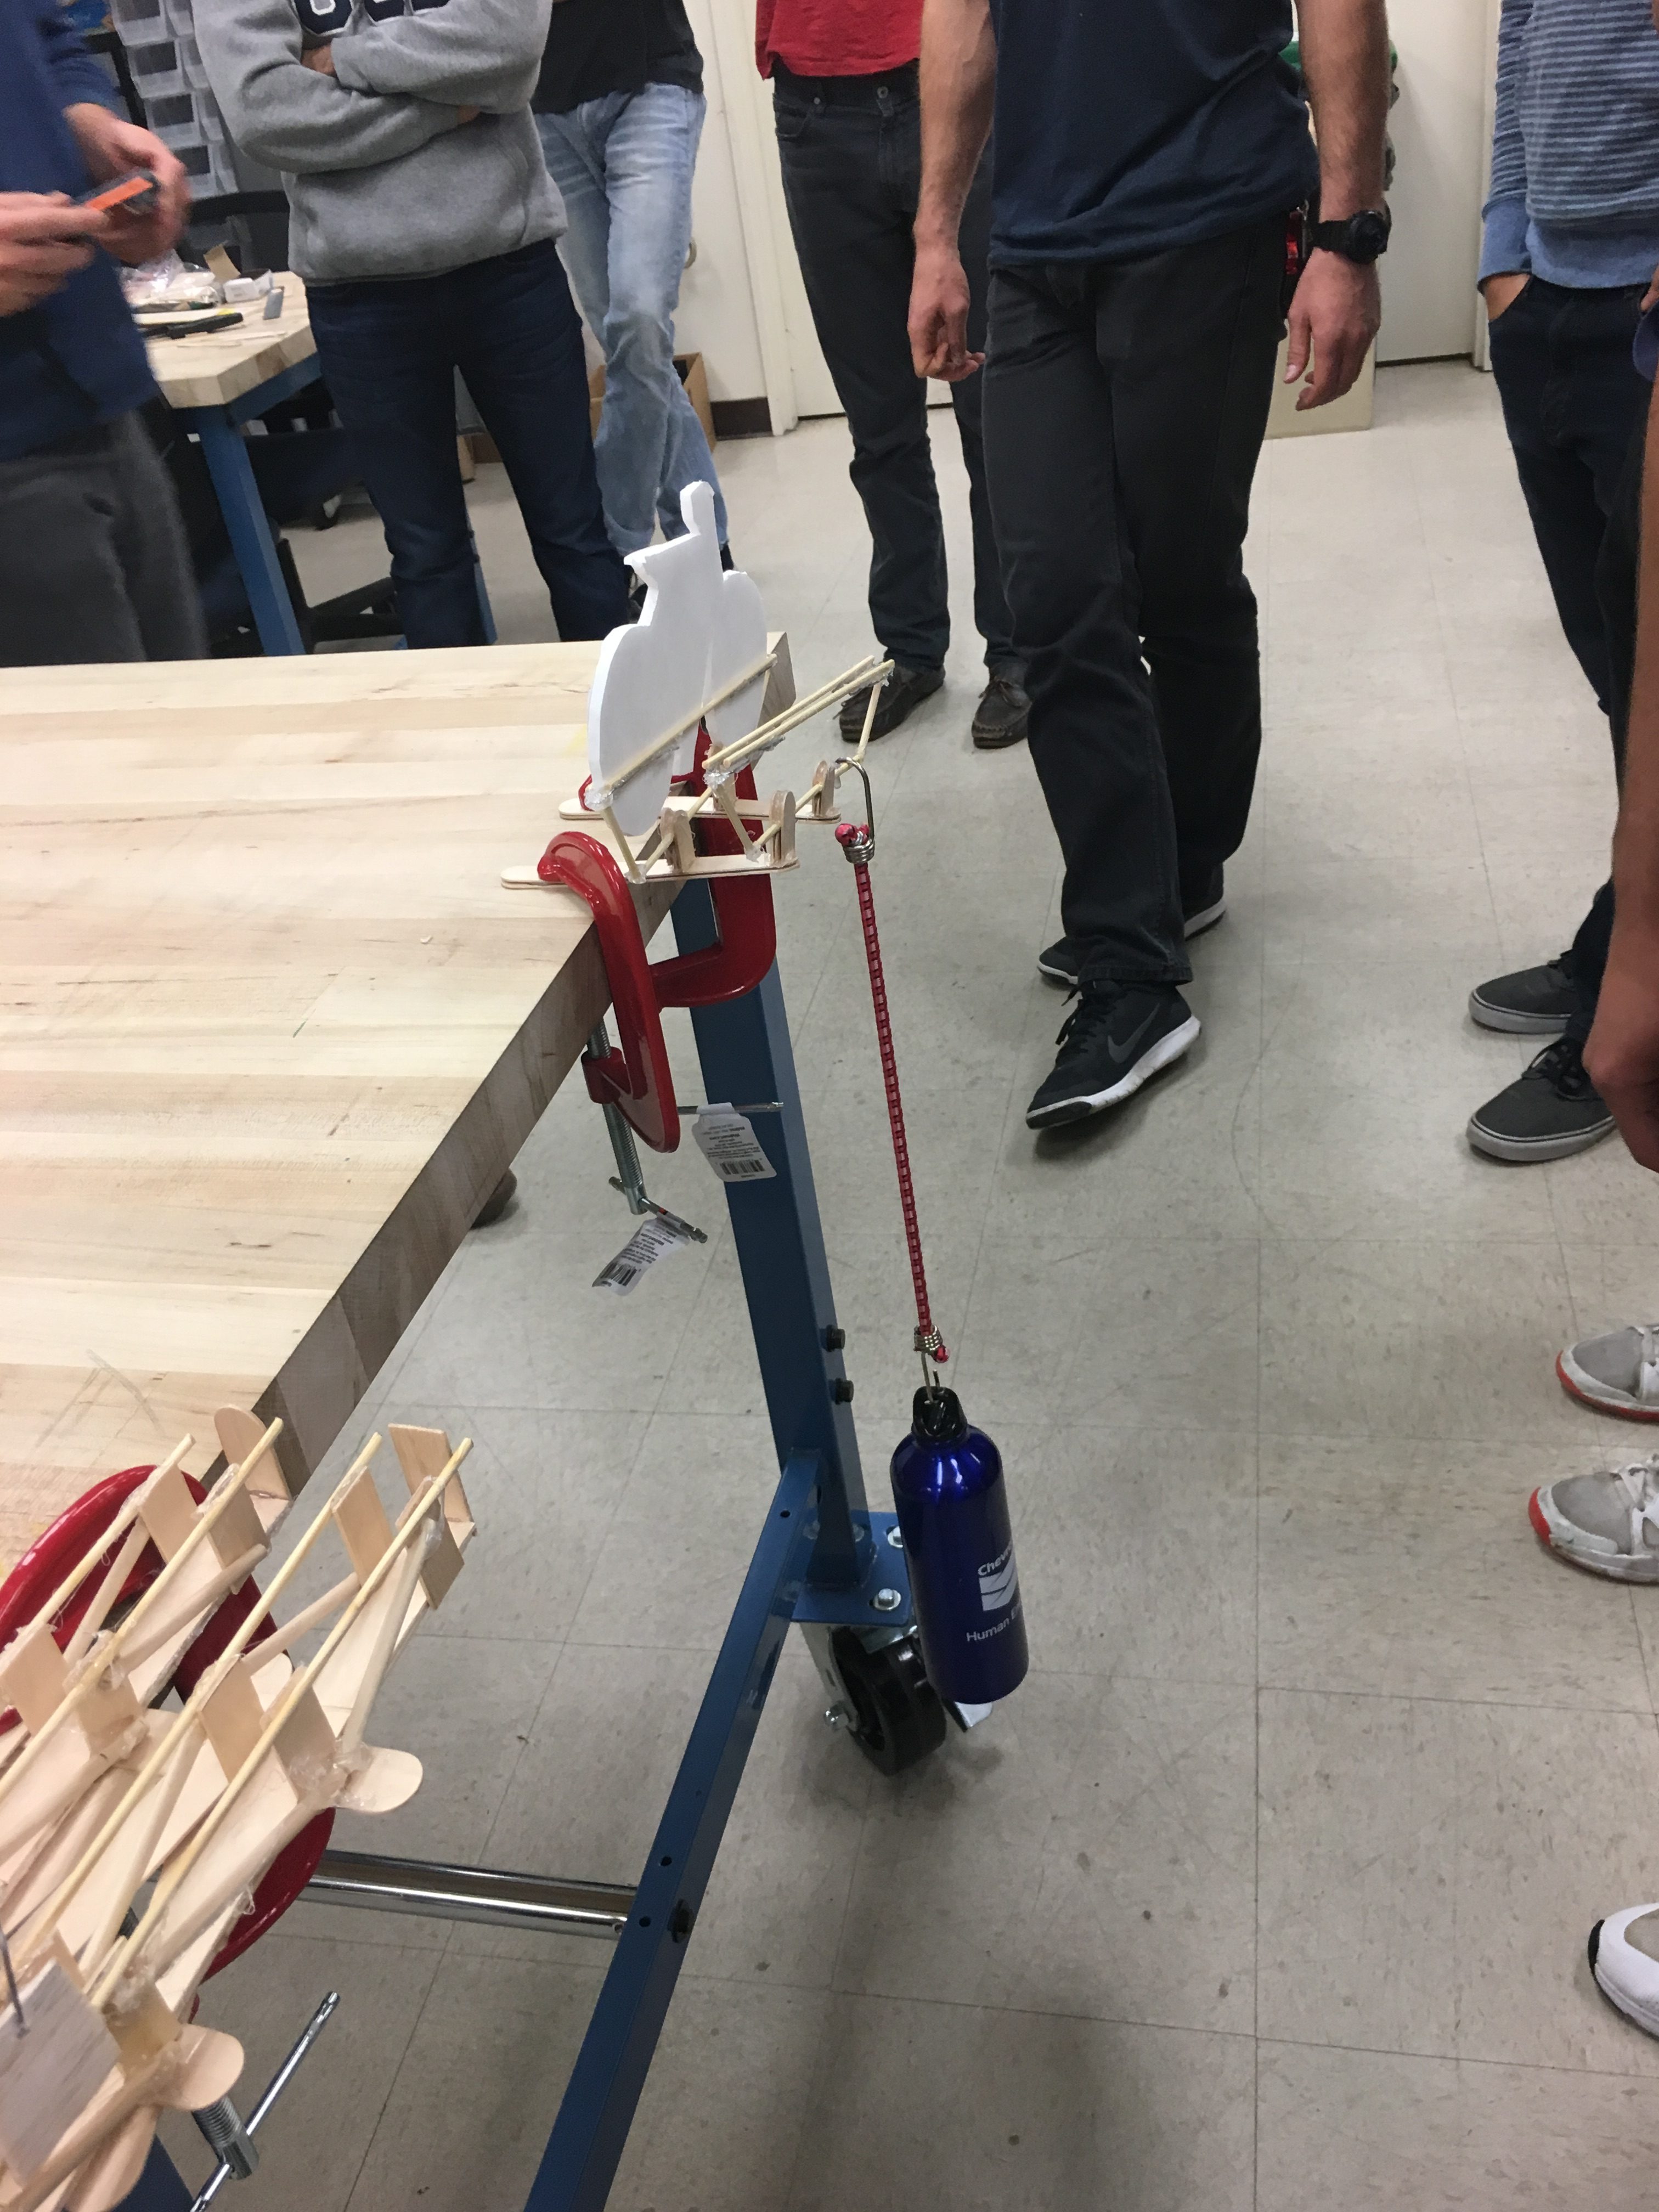
A bicycle rack prototype under load.
Results
The Prototypes
The students were able to construct scaled bicycle racks that were structurally similar to their sketches in the allotted time. Each group of four students produced two prototypes in just under two hours. The upper photo shows an example lightweight prototype and the lower photo shows the final CAD design that this prototype inspired.
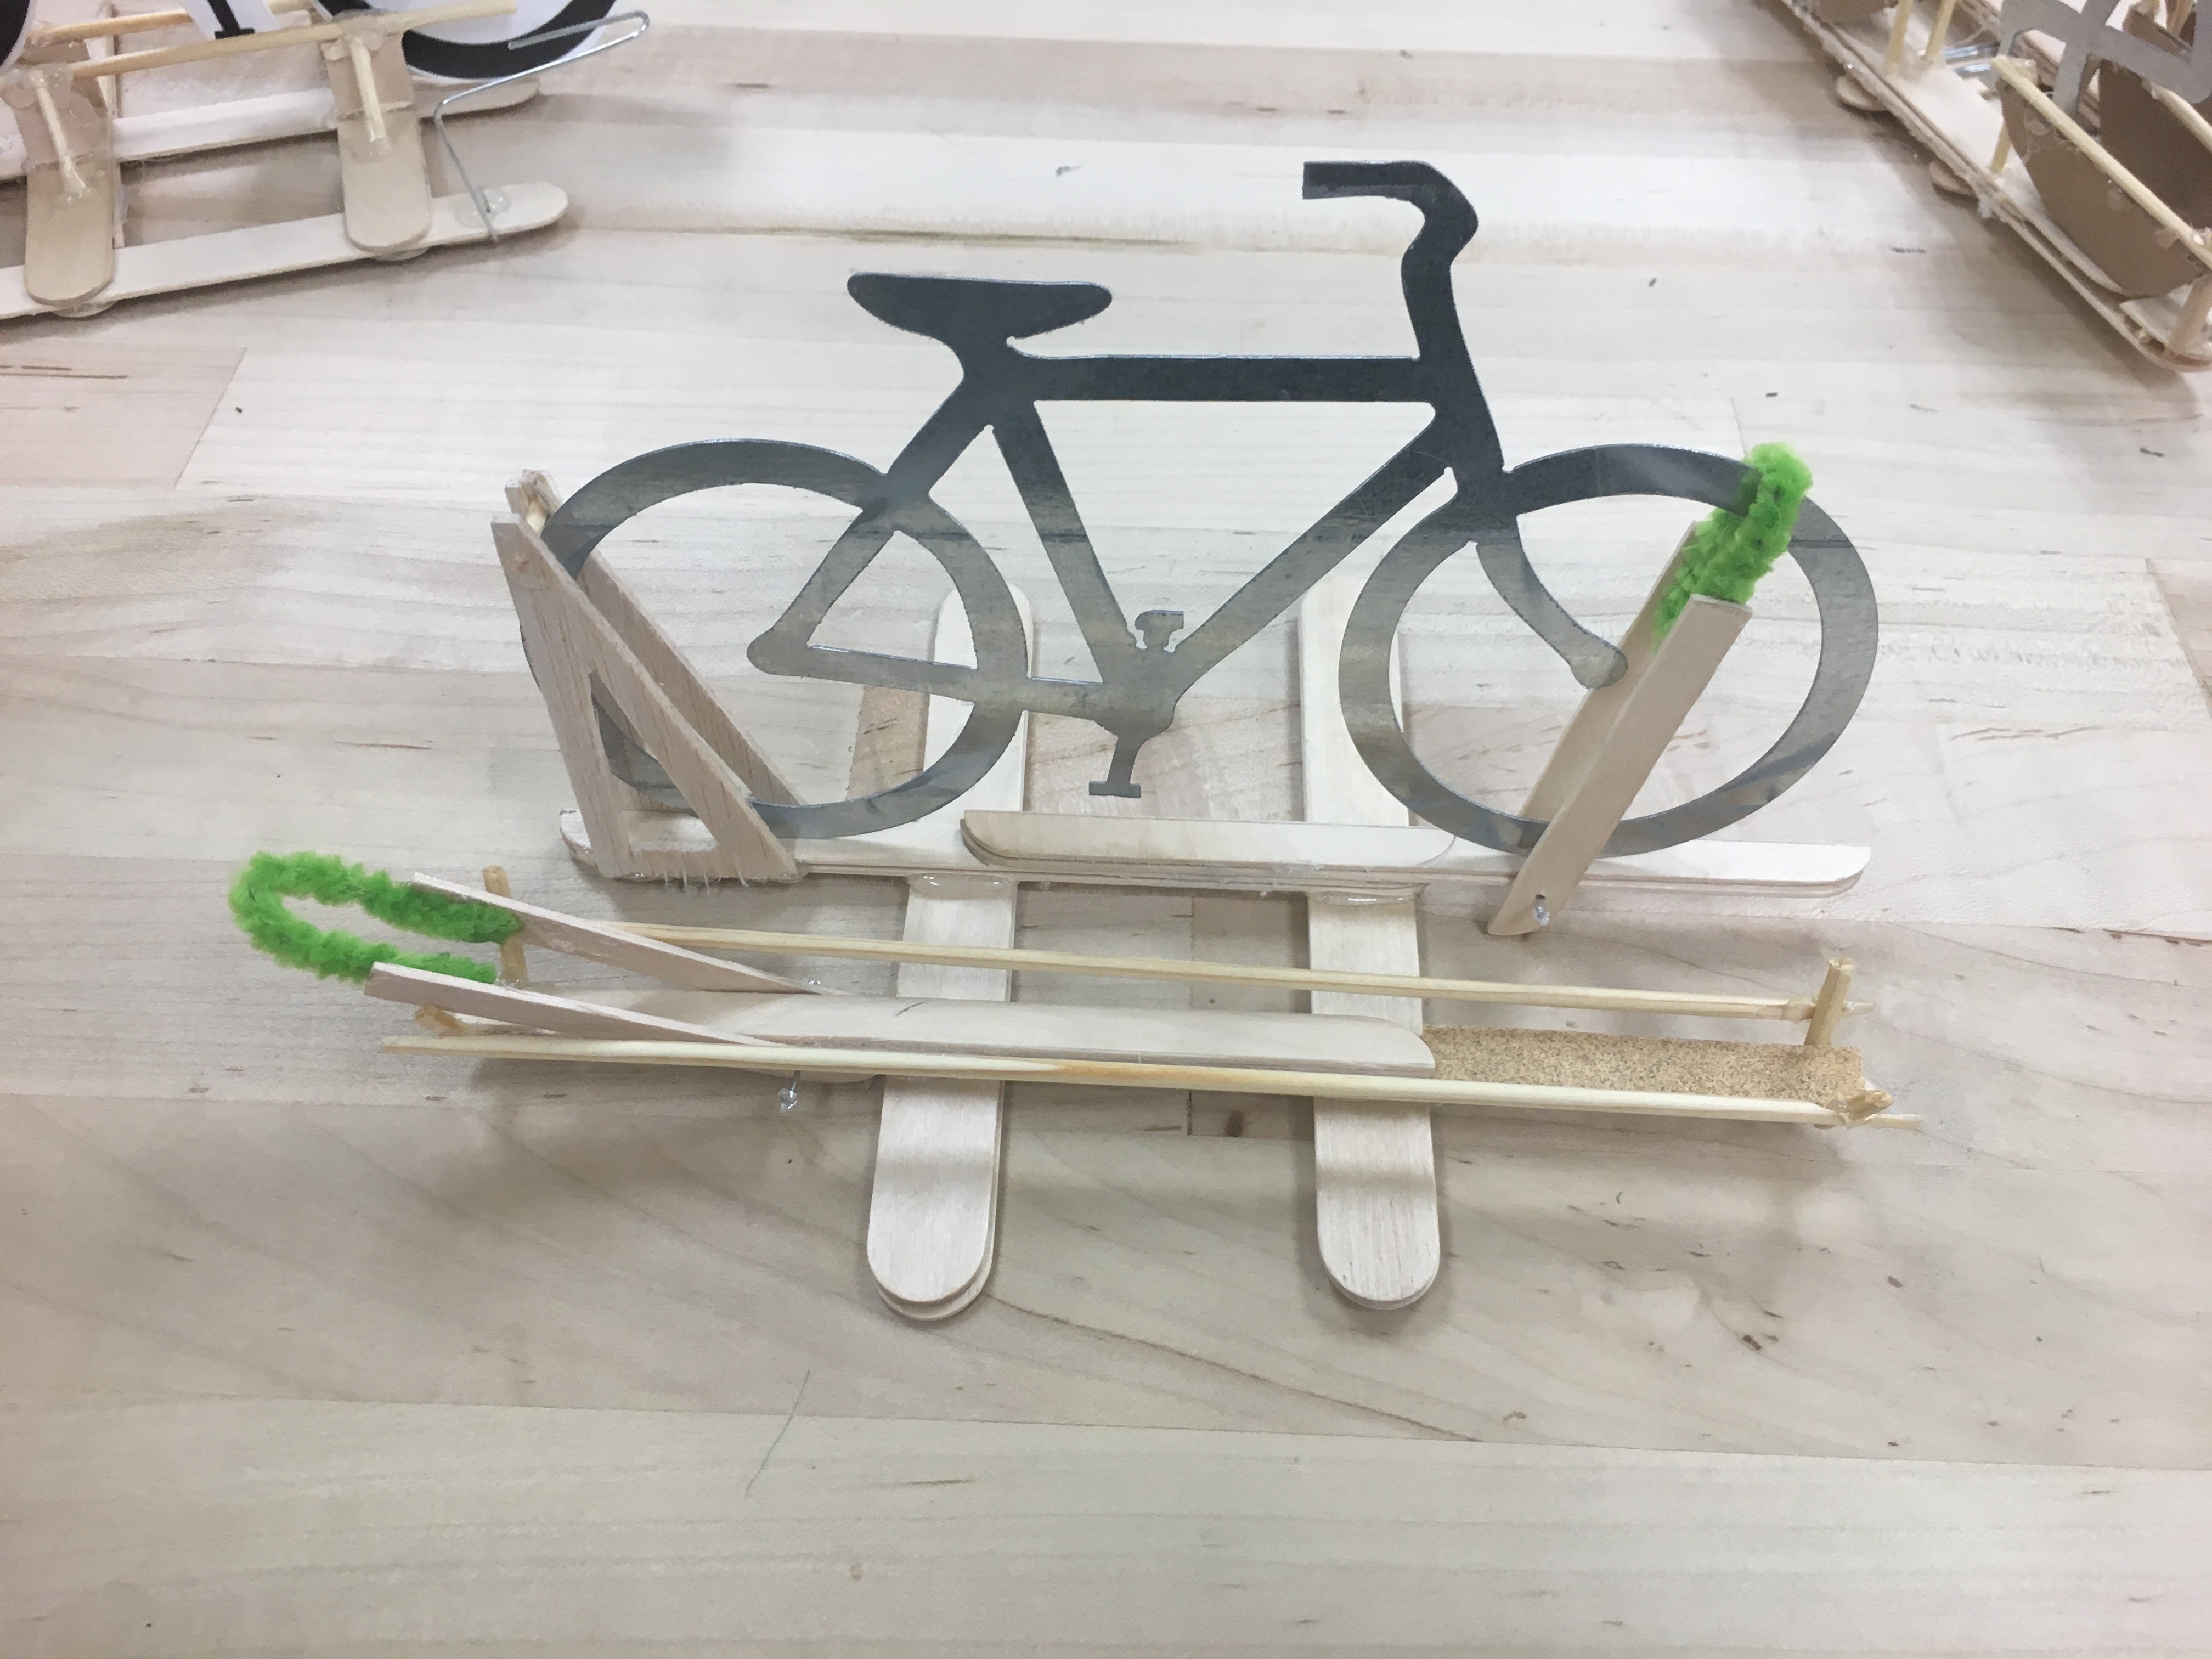
An example 1:10 scale prototype.
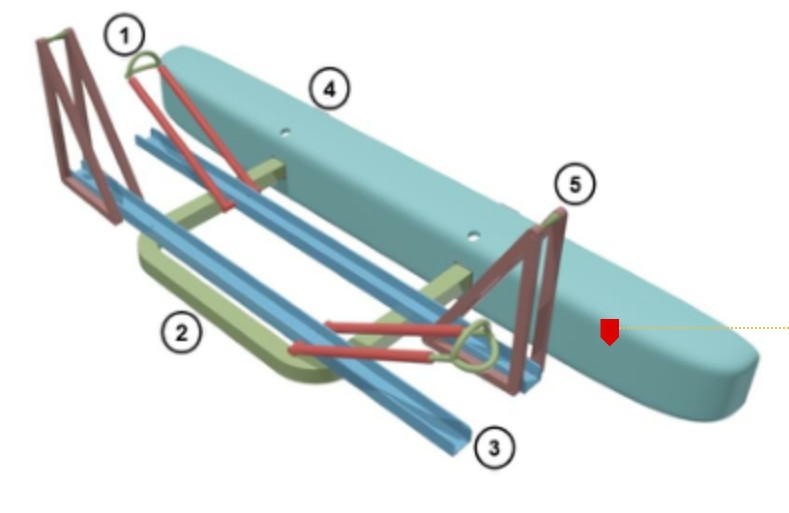
The final CAD model depicting the bicycle rack design.
The Student's Opinion of the Activity
We surveyed the students after the activity and 91% of 12 responding students stated that the prototyping activity revealed either good or bad qualities regarding the function of their design, with 9% not sure. None said no. Also, 91% felt that the activity improved the understanding of the structural integrity of their designs (9% said no). 64% of the respondents said the activity helped them decide between their two top designs, with 18% unsure and 18% stating it did not. Finally, 45% said they would use lightweight prototyping to evaluate designs in the future and 55% said maybe they would.
Many of the students were skeptical that the activity would offer anything to the design process before the activity. For example, here are some selected comments:
- "I was not really sure of how it will be helpful in analyzing the bike rack."
- "I was skeptical that we would learn much."
And after the activity there were more positive attitudes, with examples such as:
- "I believe that it gave a very nice physical perspective of the actual object, whereas if we just jumped straight into CAD software, we would probably not have too much of an idea of the scale of the actual project."
- "It was a good fast way to get an initial idea of how different rack designs would fare under load in addition to seeing it in three dimensions."
- "I think it is extremely beneficial and a crucial part of the entire design process."
With only one comment being slightly negative:
- "I believe it has some value in terms of forcing the creator to take on the perspective of a machinist. That being said, I also feel that this type of lower-level designing has less applicability to our real-world applications."
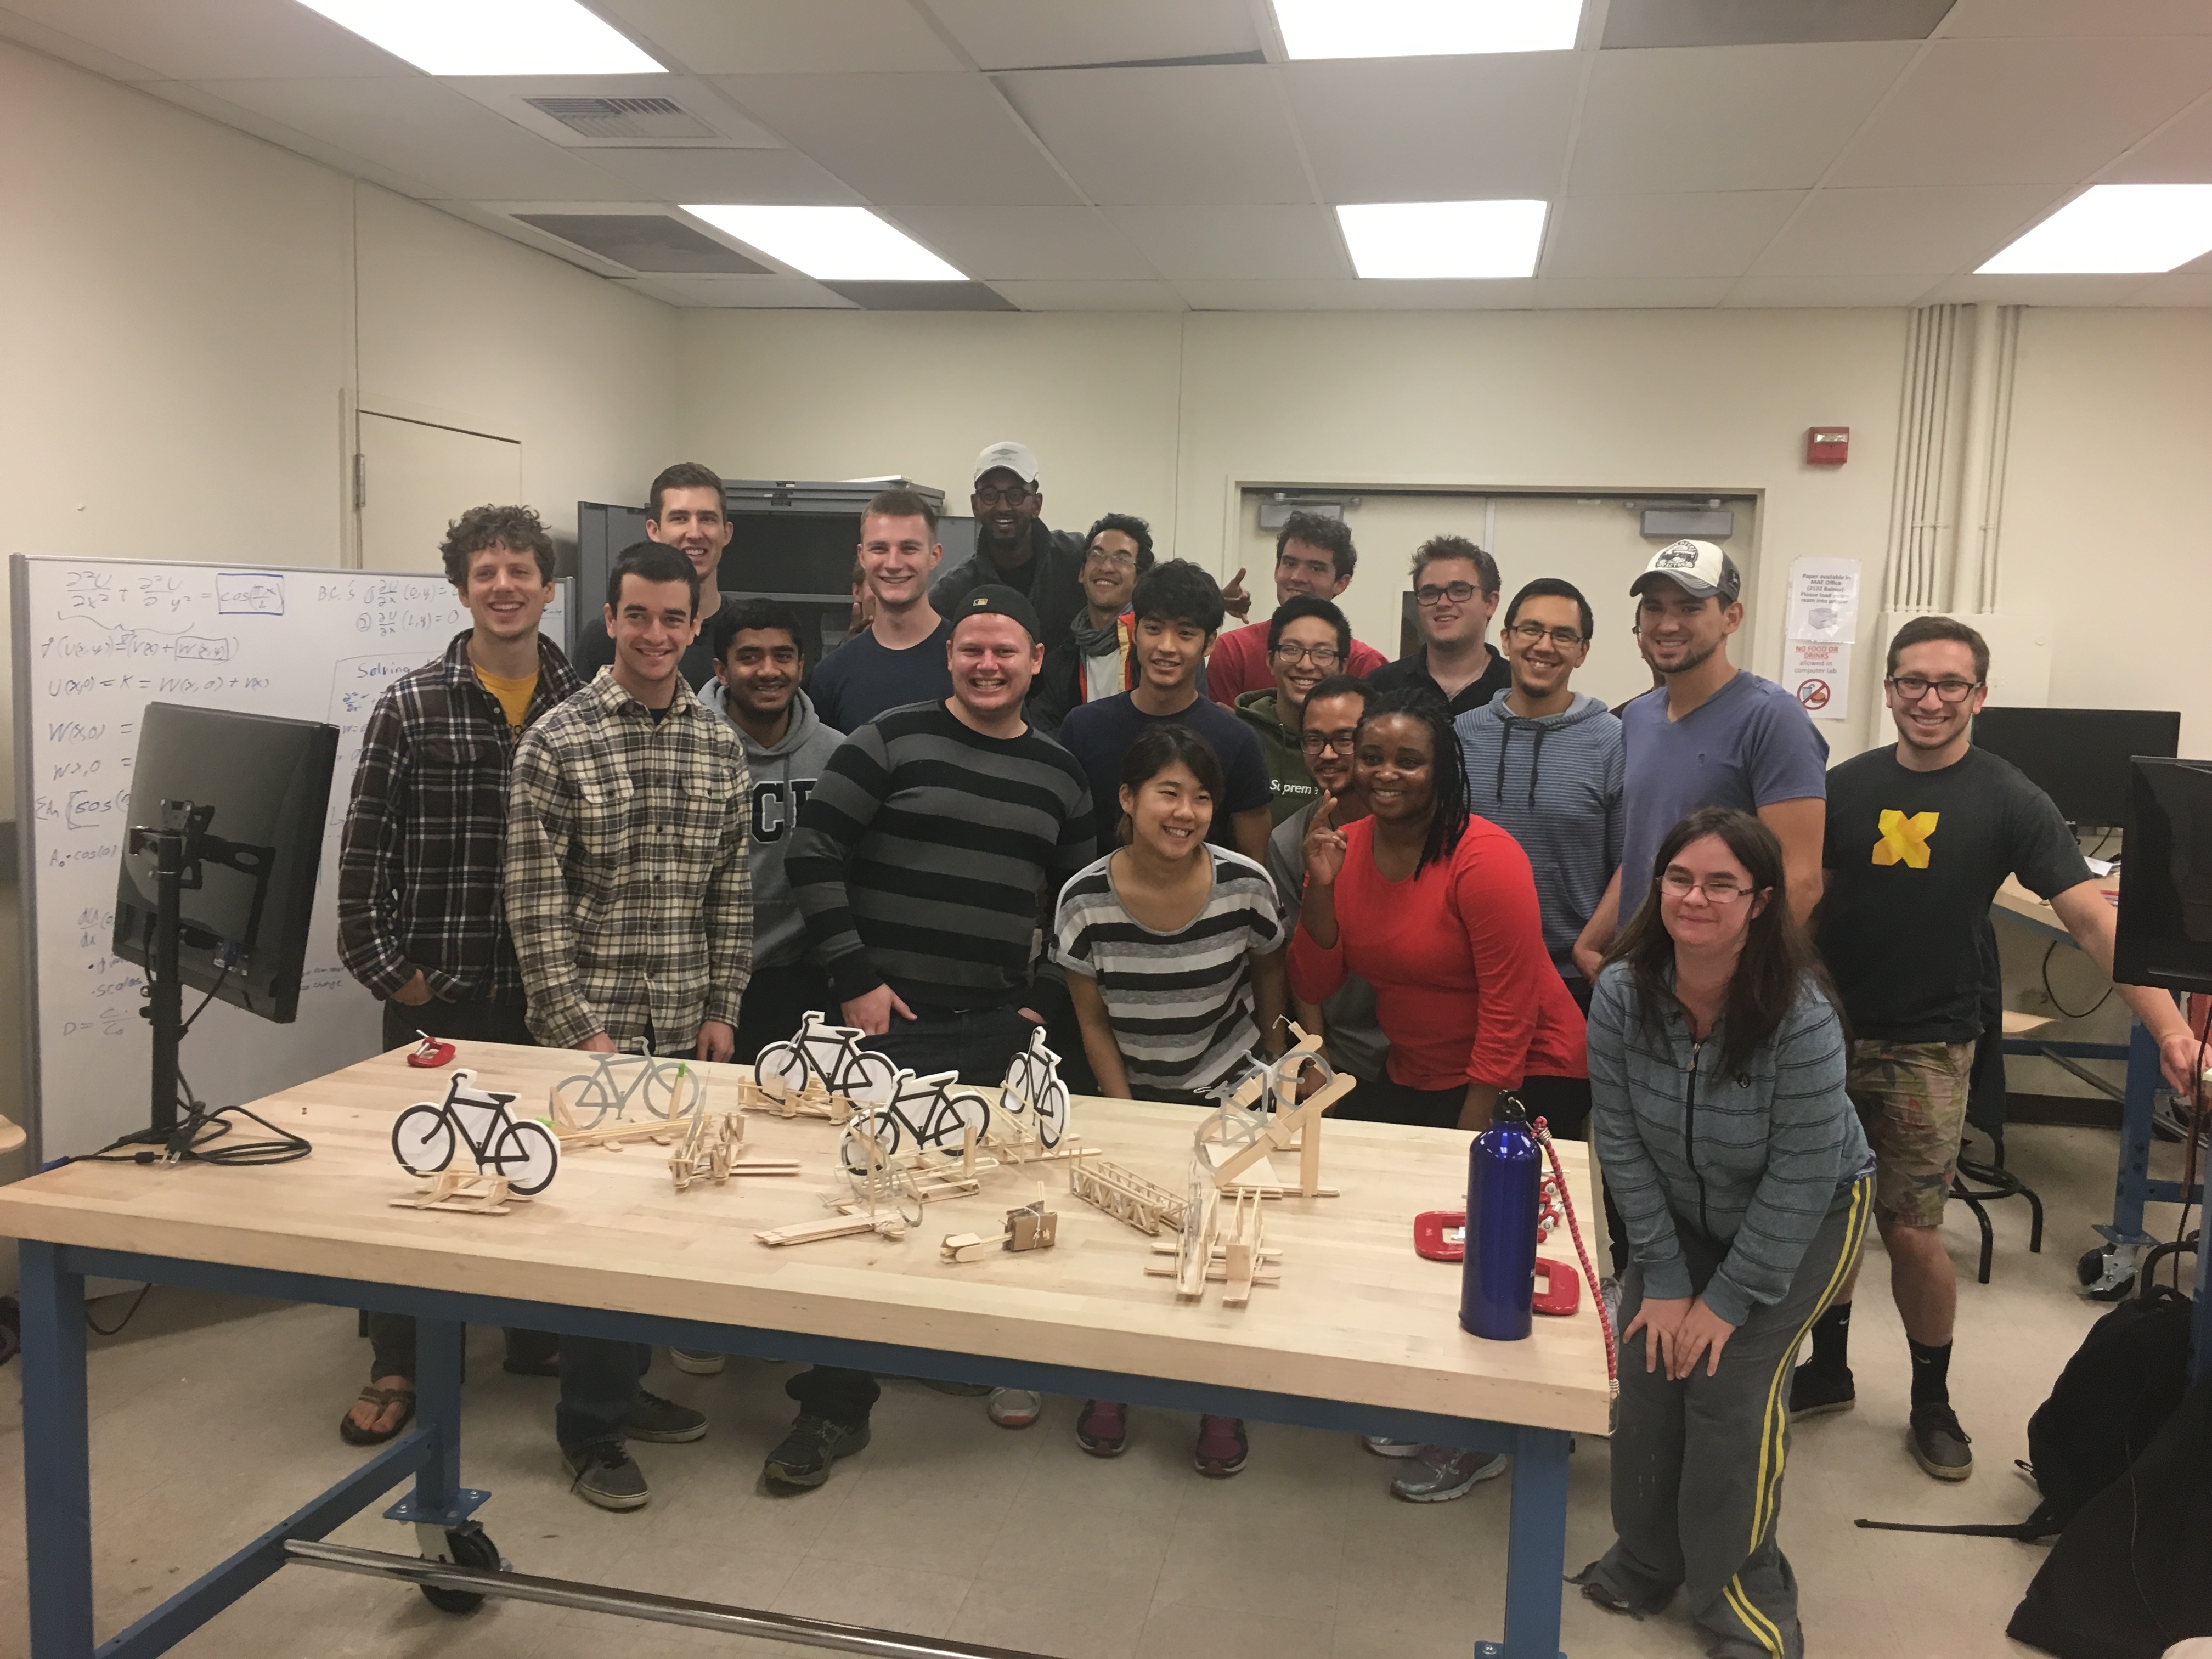
Fall 2016 EME 150A students with their lightweight bicycle rack prototypes.
Discussion
We felt the prototyping activity was one of the highlights of the course. The energy and enthusiasm we witnessed before and after class indicated that the activity had a positive effect on the students. We were surprised at the number of students that stayed after the prototyping lesson to continue working on their design. This activity introduced many of the students to an additional tool in the mechanical designer's tool belt that can be utilized to make design and engineering decisions.
There is room for improvement, as always. The scaled prototypes would more closely mimic their real counterparts with more careful choice of materials. The available materials, in particular the wide popsicle sticks, constrained some of the students' designs and they did not reflect their sketches as accurately as we'd hoped. Additionally, more time is, as expected, needed to pull this off. The students just barely finished the prototypes in time and we ended up going over a bit to finish the testing.
Lastly, more structure is needed to evaluate the designs for form, function, and structural integrity so that the students connect the activity to the theory.
Acknowledgements
Vivian Tran, an undergraduate Engineering Education Assistant, worked with me over the summer and into the fall course to develop the lesson. She also contributed to writing this article. Destiny Garcia, the teaching assistant for the course, developed the lesson plan and written materials with Vivian and delivered the lesson. Hooman Rashtian reviewed the article before publication.
This article is cross posted at the EELC blog.
References
| [1] | Dym, Clive L., Alice M. Agogino, Ozgur Eris, Daniel D. Frey, and Larry J. Leifer. "Engineering Design Thinking, Teaching, and Learning." Journal of Engineering Education, January 2005. |
| [2] | Jang, Jooyoung, and Christian D. Schunn. "Physical Design Tools Support and Hinder Innovative Engineering Design." Journal of Mechanical Design 134, no. 4 (March 6, 2012): 041001–041001. doi:10.1115/1.4005651. |
| [3] | Ulrich, Karl T. and Eppinger, Steven D.. "Product Design and Development", Fifth Edition, McGraw-Hill, 2012. |
